|
If you’ve ever played a role in crafting a new company brochure, you might be familiar with the process and steps required to create a persuasive brochure. But how do you turn all your ideas into a beautiful printed piece of art for your business? Read on to learn how.
Creating the perfect brochure is truly a work of art which incorporates the efforts of multiple people. More often than not, marketers, graphic designers, copy writers, and high-level executives are involved in the process before even contacting the printing company. We’ve already outlined some steps to creating an inspiring brochure, and now, we’ll discuss the steps you should take once you’re ready to transform your ideas into tangible collateral.
- Choose a reputable printer. As with any big purchase decision, you’ll want to shop around to find the printing company that’s the best fit for you and your brand. Not only will you want an exceptionally high-quality printed brochure, but you’ll also want the same high-quality customer service every step of the way. Don’t sacrifice the quality of your product and service for a cheaper price. Another factor to consider is production time. Depending on your deadline, you’ll want to ensure your printer can and will deliver the goods within your time frame.
- Discuss the details. Communicating with the printer’s estimator to plan your printing project is crucial. In this step, the estimator will help you plan the specifications of your brochure prior to printing. You’ll discuss your brochure’s design, size, colors, layout, paper, and quantity. This is where you’ll finalize the “nitty gritty” details of your brochure including 4, 6, or 8-color printing process, stitching, folding, trimming, coating, paper weight and texture, self cover or plus cover, and any extras to add a special final touch such as embossing, die cutting, or foil stamping. Your estimator will work with you to determine the answers to all of these options and will then follow up with a project quote.
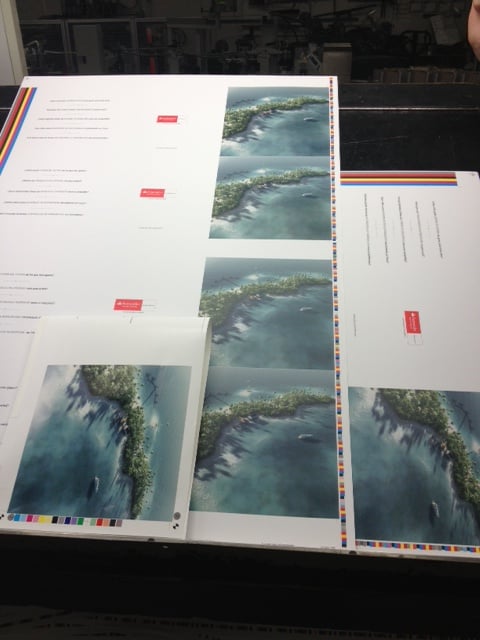
- Check the proof. Once you’ve negotiated the details of your printing project and agreed on a price, it’s the printer’s responsibility to provide you with a digital proof (or preview) of your brochure before sending it to print. If the product will be die cut, you should have a CAD cut prototype. We suggest triple-checking your proof for spelling accuracy, color fidelity, and overall design to prevent any costly errors. It’s also a good idea to have your designer and colleagues review the proof to ensure everyone’s satisfied.
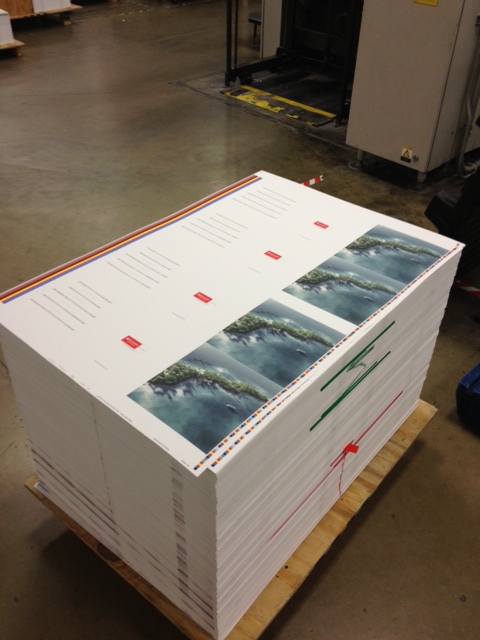
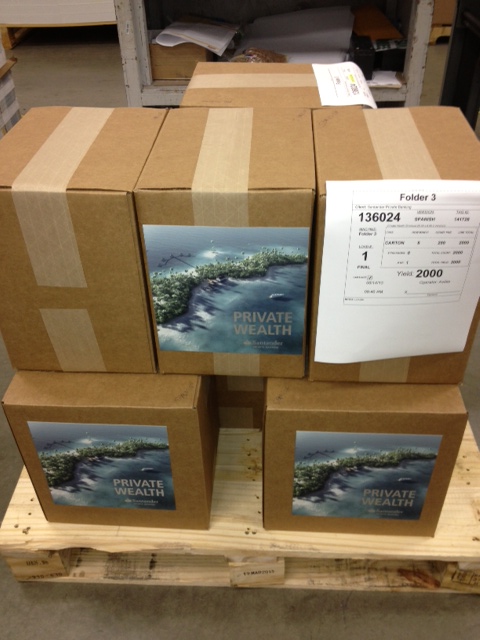
Being prepared ahead of time and knowing what to expect when printing your next brochure will save you valuable time and money while ensuring a pleasant experience with winning results. Here’s an example of a recent brochure printing project we just completed for Santander.
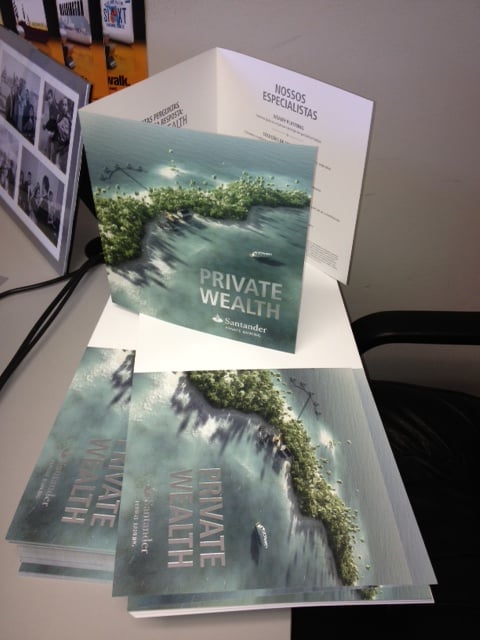
Description: Private Wealth Brochure 25.44 x 8.45 (2 Versions)
Size: 25.44 x 8.45 folded to 8 7/16 x 8 7/16
Paper: 111.0 lb. Porcelain Silk Cover
Colors: 6/6 Process + PMS + Metallic PMS + Soft Touch Aqueous Coating (really luxurious)
Finishing Specifications: Die Score, Cut, Folded, Silver 422 Foil Stamp
The customer submitted PDF files and our prepress department engineered the layout and created proofs.

Have questions about your print project? Contact us by phone or fill out our contact form, and we’ll be happy to assist you.